In Jump scare productions we have tried and experimented with different camera skills and using the right equipment needed, this will help us with filming certain shots in our horror trailer. These practice shots were taken at our college and put together as an experimentation and will be used at the location chosen by our group.
Camera & Software used
|
|
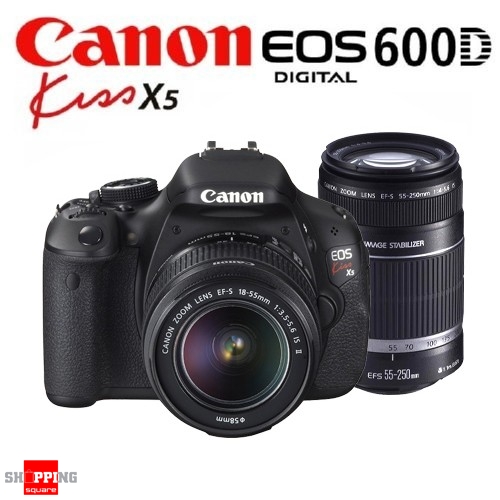
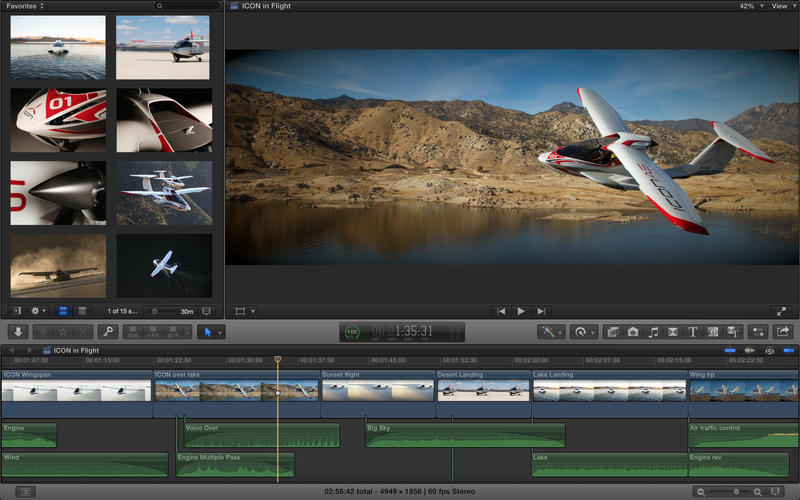
When filming we will use The Canon EOS 600D Kit 18-55mm which is easy to use, any small errors that we come across could also be fixed using Final cut pro which is a software designed to put all camera shots together editing then individually to make the effect better.
Other features which this camera includes is a built in flash Built-in Flash, Red-Eye Reduction, Continuous Shooting, 1080p Full HD video recording, Hi-Speed USB, Video output (PAL/ NTSC), HDMI mini output, Canon Compact Photo Printers and PIXMA Printers supporting PictBridge, SD/SDHC memory card support, multiple languages and Rechargeable Li-ion Battery.
Other features which this camera includes is a built in flash Built-in Flash, Red-Eye Reduction, Continuous Shooting, 1080p Full HD video recording, Hi-Speed USB, Video output (PAL/ NTSC), HDMI mini output, Canon Compact Photo Printers and PIXMA Printers supporting PictBridge, SD/SDHC memory card support, multiple languages and Rechargeable Li-ion Battery.
Basic Camera Shots
|
1.Establishing shot
This is conventional to use at the beginning of the trailer, as an opening scene as this sets the location and the time of day/ year its set in. Positives- This sets the scene well introducing the audience to the location. Negatives- This would work better if the camera was held still and not panning. 2. Pan Shot This shows the view go from left to right which would also help set the location and the time for our trailer. Positives- Establishing shot used showing the audience the location. Negatives- pan shots shouldn't last too long to improve it, we should cut it and pan slower. 3. Tracking shot This is used in the horror genre mainly for chases or slow movements when the antagonist is stalking the victim. Positives- Shows fear from the victim as he's looking back towards the camera as he knows something is chasing him. Negatives- This shot isn't very steady, therefore a tripod with wheels should be used. 4. Steadicam Camera is attached to the antagonist which is following the victims movement, this is used to make it seem more realistic. Positives- Shows fear from the victim as he's looking back towards the camera as he knows something is chasing him. Negatives- This shot isn't very steady, therefore a tripod with wheels should be used. 5. Handheld Where a small light camera is used, often creating a jerky, jagged effect to make the video seem realistic as it can be seen as found footage Positives- Shows fear from the victim as he's looking back towards the camera as he knows something is chasing him. Negatives- I think the movements are to jagged, and can barely make out whats happening. 6. Zoom shot This is done by the camera zooming in and out of the victim, this is mainly used in horror to exaggerate the reaction shots. Positives- the rule of thirds has been used to equal out the importance of the video. Negatives- the zoom in isn't smooth therefore not giving the professional look, therefore in our trailer we would having to make sure that any zoom shots done are smooth. |
7. Birds eye view
this is used by placing the camera right over the subject, this is used in horror to show how the subject has no power as it is seen as small. Positives- Shows relations and shows how powerless the victim is. Negatives- Haven't used the rule of third at all. 8. Two shot this is showing two people in one shot. Positives- rule of thirds used consistently as they walk. Negatives- As they walk on the camera should follow them. 9. Over the shoulder shot Shows two people having a conversation or in the horror genre shows the antagonist having more power then the victim. Also not giving away the antagonists identity. Positives- the shoulder is blurred giving the video scene a shallow focus. Negatives- The character shouldn't look directly into the camera and should look at the other character that is ued in that scene. 10. Long shot This is used to show the full body language from the victim as an reaction shot. Positives- Full length of the one character used showing full body language. Negatives- The shot should last for longer showing a full body length of both the characters. 11. Mid shot This shot is used to focus on the reaction shot and also other details such as the costume and make up. Positives-Half length of the one character used showing body language and costume and rule of thirds used. Negatives- The camera should be kept still to do this a tripod should be used. 12. Extreme Close up This shot is used to see the more detailed facial expressions/ reactions also focusing on the detail of the make up which has been used on the victim. Positives- This shot shows the reaction of the character clearly. Negative- On an extreme close up we should try to focus on one facial feature, such as the eye to make the horror seem more effective. |
10 Horror shots
|
1. Behind opaque glass
This is used to represent a barrier and a way the victim can escape but is to late and cannot get through to freedom therefore is killed off. This shot could also represent the difference between childhood and adulthood. Positives- The shot can be easily seen as the victim is trying to escape and get away but is to late. Negatives- Blood smired over the widow would make the effect of the victim dying motor disgusting. 2.Tracking down the corridor This shot is used to to show the antagonist following/ stalking the victim, this can been seen as a pint of view shot as its how the antagonist is seeing the situation through their eyes. Positives- This shows clearly that someone is following/ stalking the victim. Negative- For this effect to work, the camera would have to be still, to do this I would have to use a tripod with wheels. 3. Jump cuts towards camera This is low angle shot of the antagonist jumping towards the camera, the low shot is used to show the danger of how powerful the antagonist is. Positives- Shows clearly the antagonist jumping towards the camera. Negatives- The jump cuts need to follow more smoothly, this needs to be done by fading to black after each jump. 4. Low canted angle on haunted house This shot is similar to an establishing shot but slightly tilted to make the scene look abnormal. Positives- This shows a clear establishing shot of where the scene is set and what time it is. Negatives- The tilted bit was a bit jerky and when next done it should be smoother. 5. ECU iris close up This is used to show the dilation of the pupils, this is used to show the fear in the victims eyes as they hit danger. Positives- This shot shows the fear in the victims eye. Negatives- This would look a lot better if the shot was filmed closer and you could see clearly that the iris moves, this could be done with the zoom lens. |
6. CU resting before jump scare
This is a close up shot of the antagonist just before the jump scare. Positives- Good rule of thirds and shallow focus used to focus on the main part before the jump scare appears. Negatives- This would look better if the camera was kept still, to do this i would have had to use a tripod. 7. Slow mo blood droplets This is used to show a slow effect of the blood dripping this is mainly used to exaggerate the moment. Positives- The focus is clear on the droplets making it seem more realistic. Negatives- This would look a lot better if the droplet were blood as this would make it way more effective from the contrast in colors. 8. Blood wipe window jump scare This is used right before a jump scare usually to show a murder or to scare the audience to think that the victims are seriously hurt. Positives- Shows how the victim is hurt and scared/ wants to make a mark. Negatives- This would look a lot better if the window wipe were blood as this would make it way more effective from the contrast in colors. 9. Shadow of knife This is a dark shadow of a knife, this is to make the phallic object seem bigger with larger power, this also doesn't give the audience a direct image of the weapon used which creates enigma. Positives- The shadow makes the weapon look a lot bigger then it is, hiding the identity of who's carrying it, making them seem powerful. Negatives- The views of the sadder is not clear as the camera does not stay in one position. 10. Low angle weapon dragging towards out of the shot The low angle is used to show the power the antagonist has with the weapon, tis also shows the relationship between the weapon and the antagonist. This is used as it doesn't give away the antagonists identity. Positives- This shot hides the identity of the antagonist which is conventional for horror trailers. Negatives- The angle needs to be placed lower so the object seems bigger and more powerful. |
